Printing the solder paste on the PCB (Printed Circuit Board) and go through reflow oven to re-melt the solder paste and solder the electronic components on PCB is most common process in today’s electronics manufacturing industry. Printing the solder paste on the PCB just like painting on the wall. The only different is solder paste printing ask more accurately position and must control the solder paste volume on each pad. It requires a certain jig call “stencil” is a sheet-metal made and have designate aperture on the position that needs to print solder paste.
Almost of current PCB assembly manufacturer apply the “stencil” jig to enhance the solder paste printing process to get more accurately printing position of solder paste and control the solder volume. Once the solder paste print shift from its pad too much then the solder will not joint the electronic component and PCB pad together. The solder paste volume over or less quantity will make solder short or open defect.
 |
 |
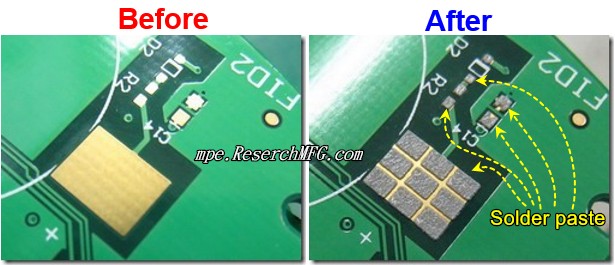
| Before solder paste screen printing. This ENIG board only has gold on the pad surface. | After solder paste screen printing. The solder paste had been printed on the big ground pad with separated area to prevent the solder joint together during reflow. |
The solder paste is a material used in the PCBA (Printed Circuit Board Assembly) to connect SMDs (Surface Mount Device) to pads on the boards. The solder paste is essentially “metal solder powder” fully mix with “flux” together. It calls “paste” because its phase is like the toothpaste we use to brush our teeth every day. The creamy solder can be easily printed on the surface of circuit board without deformation under room temperature. The “paste” can also be used to stick the electronic components already placed on the surface of the PCB without moving while PCBs are transferred on the conveyor of SMT line. The major purpose of solder paste is to fix the electronic component on PCB and archive the electronic signal communication through high temperature re-melt and solder.
3 methods to print the solder paste on the PCB
There are 3 methods of fully automatic, semi-auto and manual printer to print the solder paste on the PCB through stencil.
- Fully automatic Solder paste printer
Almost all EMS (Electronics manufacturing services) factory apply the full automatic solder paste screen printer in SMT line for the production efficacy and good quality control. Once the machine parameters settle done then printer will automatically load the bare board into printer, automatically align the stencil position, automatically print the solder paste on the board, automatically unload the board to next station for component pick and placement.
- Semi-auto solder paste printer
The semi-auto solder paste printing usually apply to the trial run products or small quantity production. Some of the small business or small quantity OEM like to use the semi-auto solder printing too. We usually setup this kind of printer as offline operation without occupy full automatic SMT line to enhance production efficiency. The operator need to manual hand put the board under the stencil and unload the board after solder paste printing. Even there is stencil auto-alignment mechanism option, but most people select manual alignment since cost is low. So, full skill and experience operator or technician are very important to handle this semi-auto solder paste printer.
-
Manual solder paste printer
The manual solder paste printer are usually apply to low cost product, low labor hour field or DIY maker. It is very simple to handle this kind of solder paste printing machine. The important is how to make the PCB align with the stencil align by trial and error and the solder paste volume and shape is hard to control. Operator need to hand load/unload the PCB under stencil, manual align the PCB, apply the squeegee to brush the solder paste upon the stencil. No recommend applying this kind of process to PCB with fine pitch components.
List out the precaution items of solder paste printing

The solder-paste printing quality directly affect to the SMT soldering quality. Most of the soldering defect come from poor solder paste printing. The solder paste printing volume and location are the key. Too much of the solder paste volume will result in solder short and less of solder paste volume may result in solder skip or insufficient wetting. Below items will affect to solder paste printing quality:
-
Squeegee type
- Squeegee angle
-
Squeegee pressure
-
Squeegee speed
-
Stencil separation speed
-
PCB vacuum block or supporter
-
PCB deformation
-
Stencil aperture
-
Stencil forming/cutting process
The solder paste printing shall base on different solder paste or glue to select proper squeegee. The stencil squeegee usually made from stainless but can also be made from polyurethane. Be careful too soft squeegee may scrape the solder paste during printing and cause “scooping”.
Most of the squeegee angle set between 45~60° when screen print.
During the solder paste printing cycle, it is important to apply enough pressure across the entire length of squeegee blade to ensure the solder paste go into the apertures of stencil and a clean wipe of stencil surface. Different squeegee pressure will result in different solder paste volume and quality. The higher pressure of squeegee on the stencil the less solder paste volume and less deviation of solder paste volume between different boards. Because of high pressure reduce the gap between the stencil and PCB.
Too much squeegee pressure can cause “scooping” of the solder paste from larger apertures, excess wear on the stencil and squeegee will reduce their life, and may cause “bleeding” of the paste between stencil and PCB. A typical squeegee pressure set at 0.5Kg of pressure per 25mm of squeegee blade.
Too little pressure can cause “smearing” of the solder paste under the stencil, poor disposition, and incomplete transfer to the PCB.
The squeegee speed will directly affect to the solder paste shape and volume on the PCB. Typically a setting of 20~28mm per second is used but this is variable depending on the size of the apertures within the stencil and the solder paste used.
Ideally the squeegee speed shall base on the viscosity of solder paste. Lower viscosity of solder paste will get better fluidity and need to give higher squeegee speed to prevent the solder paste overflow under stencil and smear the PCB that no need to have solder. The higher squeegee speed the less of solder paste volume printed on PCB.
This is the speed that stencil lift from the PCB after solder paste printed. If the solder paste release from the stencil is too fast then it will cause the solder paste not fully release from the apertures of stencil and the formation of high edges around the deposits also known as “peaking” or “dog-ears”.
Putting vacuum block or supporter under the PCB inside the printing machine will help to support the PCB, keep it flatness and prevent it from warpage and against the stencil while solder paste printing. If the PCB is not fully supported, it can lead to printing defects such as smudging and poor paste deposits.
Most of SMT factory apply the supporting pins as one-time production or small quantity production to save cost but the printing quality is unstable.
The warped PCB will get uneven solder paste printing. It will result in soldering short and open.
The stencil aperture directly affect to the solder paste printing quality. There are many articles on the website to discuss this topic.
The different stencil cutting process will affect to the solder paste release from stencil quality. There are chemical etching, laser cut, electroform, pro-coating different process to make the stencil. The less of cutting wall roughness the better quality solder paste.
Related articles:
How EMS fabricate a PCB Assembly?
Why thinner PCB will need carrier for reflow process?
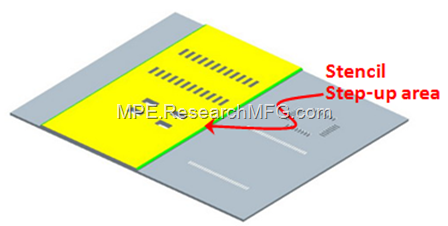
What is Step-up & Step-down Stencil? Selective Solder Paste


Leave a Reply