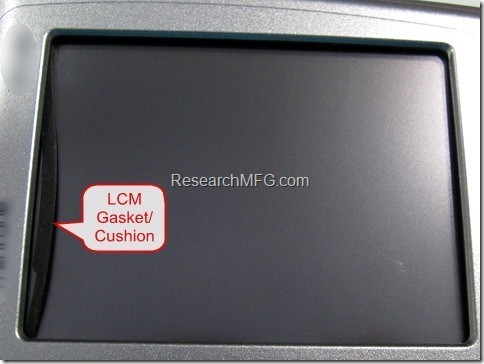
The LCM (LCD Module) is a common component for the electronic products. Almost of the LCM was made by glass and it is brittle and break easily while hit or drop on the floor due to handle careless. As product design we will install a rubber gasket or cushion locate between the glass and plastic case or metal bezel to prevent it from squeezing due to press or careless hitting.
Although this kind of rubber gasket is a simple design but if the gasket didn’t design well then the installation will be a big challenge in manufacturer. We often see the gasket go outside of the display view area. If this is a touch panel product then it will result the touch function fail. If this kind of issue happens in filed then we will get big trouble.
Therefore, this article attempts to look for the rubber gasket design methods.
1. Using double adhesive to stick the gasket rubber on display or bezel.
This kind of design should be the most people uses. It may need to use additional fixture to align the gasket on target substitute while assemble. Otherwise, rubber will not locate in correct position. Generally, this assembly method will take most of labor hours due to the rubber is soft and sickly adhesive make it hard to align without fixture. Especially more narrow width of gasket, make assembly more difficult. It also needs to consider the reliability issue.
2. Using surrounding rib to bound the rubber gasket
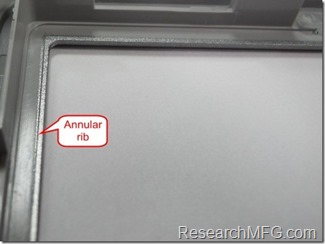
Using a recess feature to allow the rubber gasket in it by design a sounding rib around the display edge on the top case . This recess feature will fix the gasket in position without moving. The important of the design is the height of rib. As experience show the rib height shall over the half of rubber gasket thickness at least and less than 0.8 times of gasket thickness too. If the rib height is low then it won’t stop the gasket over it and goes outside of display area. If the rib height is over the rubber ratio ability then it will hit the glass. Also need to consider the impact of drop.
For example, assume that we use a hardness of 50 (Shore A) and a 1.0mm thickness of the rubber as the gasket cushion. We usually give the height of the rib around 0.7 ~ 0.8mm. Because of most of the gasket rubber design 0.8 compression ratio at least.
This kind of product design will require smart, agilely, proficiency operator for the assembly. It also requires paying high attention to the chassis deformation, especially for the plastic parts. As experience show the rubber gasket will go through this big gap of chassis deformation area to outside. I do recommend detect the chassis weak point during the design stage with drop test and give reinforcement to prevent it happening. Sometimes we will combine this sounding rib and double adhesive as solution to prevent the rubber gasket from malfunction.
In addition, I do recommend using the existed mechanical structure of chassis to hook the rubber gasket. This will truly prevent it go outside of the display again.
3. Design clad cushion rubber gasket
This method takes advantage of the elasticity characteristics of rubber to designs a LCM outline suitable clad rubber and make LCM wear it. Once the gasket cover the entire LCM, the LCM outline will limit the gasket without moving and no need to worry about the adhesive will degrade after time use. It also covers the plastic chassis with serious deformation problem.
However, this kind of rubber gasket can’t be finished by simple knife tooling. It requires a complex hard tooling to fabricate the clad gasket. It tooling and material may more expensive than above two solutions but it really give high quality, reliability and easily assembly.


Leave a Reply